How to Use the Guide Lines on Your Reverse Camera?
Once you start using the reverse camera, there is no going back and for all the right reasons. It can prove to be quite beneficial. Keep reading this article to learn more about the reverse camera.
Understanding the lines
Most users know how to function backup camera lines, and this is mainly because of its easy design. Most camera manufacturers utilise the classic stoplight method, in which green means go, red means stop and yellow means caution.
Using backup lines is rather easy. However, this explicit list will tell you everything you need to know.
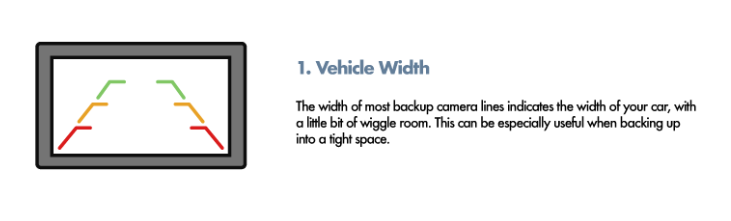
Vehicle Width:
This is the first thing you need to keep in mind while trying to understand the backup camera lines. Understanding the width of the vehicle is important when it comes to squeezing your car in tight spaces. The two lines at the edge of your camera screen show you how broad your car is.
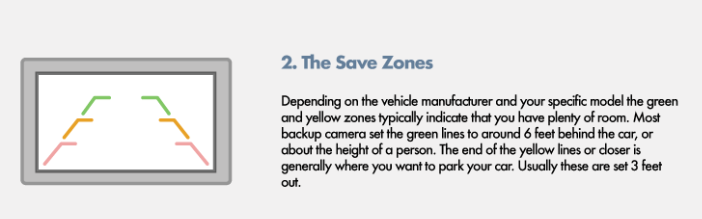
The Safe Zones:
This mainly depends on the manufacturer or specific model of backup camera you have. The green and yellow zones are the usual indicators of space. The majority of cars have at least 6 feet of space behind it where the green lines show. Below that are the yellow lines, which is the safe distance you should keep between the car and the curb.
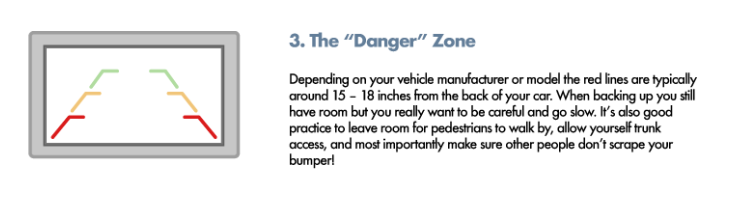
The Danger Zone:
This is what the red lines in the camera display portray. Much like the safe zones, this too depends on the manufacturer as to how far they are set. Usually, these are at a distance of 15 to 18 inches. However, red zones should be avoided at all costs as they mean your car can hit the wall. This is why if your car is near the red lines, you should be rather careful. It will help if you ask someone to be another pair of eyes to physically understand how much space is left.